Wednesday, December 7, 2011

Alfajores


I just love Alfajores!!! I was born in Lima, Peru and I remember when I was little my grandmother making them and the whole house smelling like pastry and my cousins and I running to the third floor where my grandmother had her kitchen and just waited until the cookies came out of the oven and watch my grandmother put them together with manjar blanco (Dulce de leche).  It was just amazing, every single bodega (store) in Lima sold alfajores wrapped individually in parchment paper for an equal or lesser amount of a US quarter.
But many people think that Alfajores originated in Latin America...well, that is incorrect.  The 'alfajor' is actually a traditional Arabic confection called 'Alaju' that was brought to Spain by an Arab general named Musa Ibn Nusair during the conquest of Medina Sidonia, Alcala de Guadaira and Carmona.  The name Alfajor originated from the Nebrija-Spanish Dictionary as 'alfaxor' or alaxur'.
Alfajores presence became known in Southern Spain during the 12 and 13th centuries being developed in Andalucia 'Cuidad de los Gitanos' (City of Gypsies).  Alfajores were brought to Venezuela and Peru first by the Spaniards and then made itself known through out all Latin America.
I do hope that you have enjoy this bit of history and that you will also enjoy this great recipe.
Alfajores

Recipe:
3/4 cups of sugar
1 1/2 cup of unsalted butter (2 1/2 stick)
2 tsp lemon zest
1 1/2 cups of all-purpose flour
2 cups of corn starch
3/4 tsp salt
1/4 tsp baking soda
1 1/2 tsp baking powder
dulce de leche
shredded coconut
powder sugar

Directions:
1. Preheat oven at 350° F 
2. Line cookie baking sheet with parchment paper
3. Mix sugar and butter until light and fluffy
4. Add lemon zest

5. Sift all purpose flour, cornstarch, salt, baking powder and baking soda together

6. Add sifted dry ingredients to the butter mixture, do not over mix 

7. Roll out the dough, using as little flour as possible, about 1/4 inch thick 
8. Cut with a small round cookie cutter

9. Place cookies 1/2 inch apart on prepared cookie sheet
10. Bake for 8-10 minutes
11. Remove cookies immediately to cool on a wire rack
12. Once cookies are cooled, spread cookie with a teaspoon of Dulce De Leche, then sandwich together      with another cookie
13.  Roll the sides in the shredded coconut

Enjoy!!!

Wednesday, November 30, 2011

Strawberry Cupcake

My daughter NellyBe is turning 14 this coming Saturday and we have been planning this party for the last month, she decided to have a Pink and Black Party.  Yesterday she tells me that she wants pink cupcakes for her party, I thought maybe a dark chocolate cake with pink butter cream frosting, but no she wants it.  Well last night I got to work and my first batch came out to doughy which I did not like but the second batch with a bit of changes came out awesome, I will definitely put up some pics after Saturday of her party , but for now I hope you guys enjoy this recipe.

STRAWBERRY CUPCAKE


Ingridients:
2 1/2 stick of unsalted butter at room temp.
3 cups of sugar
1 1/2 cup pureed frozen strawberries
4 1/2 cup of cake flour  ( 4 cups of all purpose flour + 5/8 cups of starch)
5 1/4 tsp baking powder
3/4 tsp salt
8 egg whites
2/3 cup of milk
2 to 3 drops of red food dye

Preparation:
1. Preheat oven at 350° F
2. Set up cupcake trays with liners
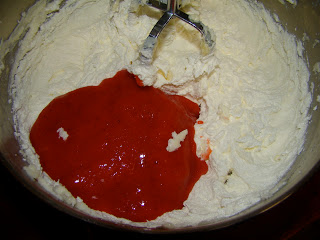
3. Using a stand mixer cream sugar and butter until light and fluffy

4. Mix in the strawberry pureed


5. In a separate large bowl whisk together the flour, baking powder and salt
6. Add flour mixture to the butter mixture and mix until fully incorporated

7. In a small bowl whisk together the egg whites, milk and coloring


8. Add the half of the milk mixture to the rest of the batter and mix until incorporated about 1 min.


9. Add remaining half and mix together

10. Place batter in the cupcake liners filling 1/2 way
11. Bake for 20-25 min
12. Allow cupcakes to cool for 10-15 min


13. Frost cupcake with the forsting of your liking ( I frost them with a Lemon Cream Cheese Frosting)


* You can also use (3) 9 inch round cake pan or (3) 8 inch square cake pan

ENJOY!!!

Tuesday, November 29, 2011

Chocolate Chip Scones

I have to say that I absolutely enjoy the mornings in my house, the ratchet of my kids getting ready in the morning, the noise of my 5 year old Christopher laughing and running after my two chihuahuas, my 8 year old Mei-Li following my 13 year old NellyBe around, Nellybe complaining about Mei-Li and my 12 year old Ana running up and down the stairs trying to get ready, the house just feels completely empty as soon as they are goan to school.  Most of the time I eat breakfast by myself, but today my hubby decided to accompany me during breakfast, he is out of the house everyday around 5 am so we don't get to eat breakfast together very often.  Wilson is a Sergeant in the US Army so when he is able to eat breakfast with me or the kids is very special, I decided to make one of his favorite SCONES.  The first time i made the scones was a year ago for a PTA breakfast at my children's school, the teachers loved them.  My husband was my helper he tasted all the different scones i made, i think he gained about 3 lbs after eating almost half of the batch of scones I made.  I hope you enjoy this recipe as much as my husband Wilson those.

CHOCOLATE CHIP SCONES

ingredients:
1 cup of all purpose flour
1/4 tsp salt
1 tsp baking powder
2 tbsp of sugar
1/2 cup (1 stick) unsalted butter, chilled and cut in cubes
3/4 semi-sweet chocolate chip
1 egg
2 tbsp milk

preparation:
1.  In a bowl combine flour, salt, baking powder and sugar
2.  Add butter and rub in with fingertips until butter is reduced to size of rice grains 
3.  Stir in chocolate chips 
4. In another small bowl mix eggs and milk
5.  Add liquids to the dry ingridients with a fork, dont over mix
6. Press dough out onto lightly floured surface to 8-inch round


7. Cut round into 6 wedges.  
8. Transfer wedges to prepared baking sheet, spacing 1 inch apart. (Can be prepared one day ahead, so you could cover and refrigerate at this point if needed). 
9. Bake at 425°F for approximately 12-15 min. or until golden 

ENJOY!!!!


Saturday, October 29, 2011

Apple Pancakes with Cider Syrup

Saturday mornings are very important in my home, is a routine or better yet a tradition to prepare a big breakfast and sit together as a family.  Usually on weekdays the kids have cereal or home made pop tarts and then their off to school, so weekends are family time.  This morning I woke up and wasn't sure what to cook for breakfast, I thought maybe a breakfast tart but then my son woke up and just suggested pancakes, well a couple of months ago my mother e-mailed me a recipe for apple pancakes and apple cider syrup, well I decided to make it and I have to say that the apple pancakes were delightful my kids couldn't get enough.  I hope you enjoy the recipe as much as I did.


Apple Pancakes with Cider Syrup

Ingredients

  • 1 cup all-purpose flour
  • 1/2 cup whole wheat flour
  • 2 tablespoons sugar
  • 1/4 teaspoon baking soda
  • 1/2 teaspoon salt
  • 1/2 teaspoon ground cinnamon
  • 1 cup finely chopped peeled apple
  • 1 1/3 cups buttermilk
  • 2 egg, separated
  • 2 tablespoons butter, melted
  • 1/2 teaspoon vanilla extract

  • SYRUP:
  • 1/2 cup sugar
  • 1 tablespoons cornstarch
  • 1 1/3 cups apple cider 
  • 1 cinnamon stick  or 1 teaspoon ground cinnamon
  • Dash ground nutmeg

Directions

  • In a small bowl, combine the first six ingredients; stir in apple. Combine the buttermilk, egg yolks, butter and vanilla; stir into dry ingredients. In a small bowl, beat egg whites until soft peaks form; fold into batter.
  • Pour batter by heaping 1/4 cupfuls onto a hot griddle coated with cooking spray; turn when bubbles form on top. Cook until the second side is lightly browned.
  • Meanwhile, in a small saucepan, combine the sugar, cornstarch and cider until smooth; add cinnamon stick. Bring to a boil over medium heat; cook and stir for 2 minutes or until thickened. Discard cinnamon stick. Stir nutmeg into syrup. Serve pancakes with warm
  • syrup.

Thursday, October 27, 2011

Dulce de Leche Cake

Hello! This is my first time writting or having a blog, I just hope I do a good job, and I hope you all enjoy my recipes and creations.


Dulce de Leche has always been part of my life, I remember when i was a little girl my mother making alfajores and pionono (similar to a jelly roll, but instead of the jelly filled with dulce de leche).  I just loved it! I remember my mother boiling the cans of condense milk to cook them in to dulce de leche..I used to think it was a long process.
One of my favorite cakes my mother used to make was a Dulce de Leche Cake, it was a vanilla cake filled with dulce de leche and dulce de leche icing.  I hope you enjoy the recipe.

Vanilla Bean Cake:
1 cup unsalted butter, softened
1 1/2 cups white sugar
8 egg yolks
2 teaspoons pure vanilla extract
1 vanilla bean, split and seeds scraped out2 cups all-purpose flour
2 teaspoons baking powder
1/2 teaspoon salt
3/4 cup milk


To Make Cake:

1. Preheat oven to 350 F . 
2. Butter and flour two 8-inch round pans.  
3. Whisk together the flour, baking powder and salt. Set aside. 
4. In a large bowl of a stand mixer, cream together the butter and sugar until light and fluffy.  5. Beat in the egg yolks one at a time, then stir in the vanilla and vanilla bean seeds. 
6. Beat in the flour mixture alternating with the milk, mixing just until incorporated.  Do not over mix. 
7. Pour batter into prepared pan.  Bake in the preheated oven for 30 to 35 minutes or         toothpick comes out clean. 
8. Cool 15 minutes before turning out onto cooling rack. 

For the Dulce de Leche Frosting:
1 cup unsalted butter, softened
4-6 cups powdered sugar 
1/2 of a 14. oz can of Dulce de Leche
1 teaspoon milk
1 teaspoon pure vanilla extract


To Make the Dulce de Leche Frosting:

1. Cream together butter and powdered sugar (starting with a few cups and working up).  
2. Add the Dulce de Leche, milk and vanilla.  
3. Cream everything together. 

** If mixture is too thin, add more powdered sugar.  If mixture is too thick, add more milk or Dulce de Leche.

For the Filling:
1 can (about 14 oz.) Dulce de Leche


Assembly:
1. Spread one full can of Dulce de Leche    evenly over one cake layer.  
2. Top with the other cake layer, and use the Dulce de Leche frosting to frost the sides and top of cake.  

**With extra frosting, pipe a design on your cake border. 


Now please have in mind that I am not a professional, but the cake sure taste delicious.  Enjoy!!
Related Posts Plugin for WordPress, Blogger...